About Me My Classroom Freebies Collaboration Image Map

Friday, September 19, 2014

An Apple for the Teacher Blog Hop


It's an apple themed blog hop!  You are in for a treat this weekend.  I must say that I have been going all out with apples this year.  We have focused on Johnny Appleseed and apple facts.  It is so much fun when you have a unit that is all thematic.  My kids have really enjoyed it too!

The past couple of weeks we have done ALL things apple.  I have created a HUGE Reading and Writing Workshop apple unit.  You are in for a treat - you can enter to win my new product!  It has 200+ pages, and I haven't even put it in my store yet.  You are going to be the lucky winner if you enter below!  

Check out some things in the product and see what we have done so far to learn about apples!


We practiced making predictions and used these fun apple themed books/worksheets!

We practiced writing facts about Johnny Appleseed.


Then, we made our Johnny Appleseed Fact book!  I am going to place these on our apple tree in the hallway. :) 

We reviewed how to wire a topic sentence and even used the fancy word - thesis!  There are some practice thesis statements in the packet.


We talked about good sentences versus bad sentences.  It is important to know the difference and my students have been struggling with writing incomplete sentences.


We even made apple cider!  This was SO much fun!  I have a juicer, and I brought it in to school.  Each child had a turn pushing the apple into the juicer.  They had a blast.  You can see how much they enjoyed the drink!

Please enter my giveaway to win your own copy of the Writing and Reading Apple Workshop Unit!


Thanks for stopping by!  I hope you have had a great start to your school year.

Here is an ABC apple matching freebie just for YOU!  Click on the image to download today!

Be sure to visit My Fabulous Class next!

My Fabulous Class

Thursday, September 11, 2014

Math Workshop

Now that we have things started for the school year, we have dived into Math Workshop! It has been exciting and fun getting these started in our room.  I personally love it because I can teach the math lesson to a small group and I know for sure that each child is listening and learning the lesson.  I can easily redirect them or differentiate right on the spot for students that are struggling or excelling.  I love that!

Here is how it works:

M stands for Math Facts.  Students will practice math facts with their math partner.  They will use the tablets to practice or use flashcards.  I also set students up on Xtramath.com where they can take math timed tests.  I love this because I don't have to take class time to distribute the test or spend time grading! 


A stands for At your seat. This is when students complete math boxes (I use the Everyday Math program).  Math boxes are a review of what we have learned and practice for what we are about to learn.  I
check these and if students do not get them correct, then they must fix them the next day during this center time.  If they finish their math boxes, then they number scroll.  I use Pringles cans to tape their number scrolls to.  One of our second grade math standards is to know numbers 0-1000.  This is a great way to let students get comfortable with the numbers.


T stands for Teacher choice.  During this time I teach the math lesson to a small group.  If we are on a review lesson, then I might have an activity set up for students to complete while I roam the room.  This center is all up to me! 


We practiced patterns on our number grid during this lesson!


H stands for Hands on activities.  This is when students play the math games.  This might be their favorite center.  I love it because students get to really practice the skills in a fun way! 


Here they are playing a money exchange game.  They love it! 

You can find my Math Workshop Ocean posters in my TpT store if you're interested! 

http://www.teacherspayteachers.com/Product/Math-Workshop-Ocean-Themed-Posters-1385445

Thanks for visiting!  I hope you find this useful! Have a great week! 

Monday, September 8, 2014

Work Work Centers

So this summer I did a lot of planning and a lot of prepping for my word work centers.  I wanted them to be fun and challenging for my second graders.  So, I came up with a plan to have my students have the option to do four different things during word work time.  Also during this time I will pull a small group to work on reading strategies.  I am always needing extra time to work with a small group.

I started out by teaching my kiddos the four different options for Word Work.

1. Practice spelling words.  I have two different lists each week.  My students are able to take the test Monday to find out whether they will be practicing the on-level list for the week or the advanced list.  I have both lists posted in the room and students will refer to these words when they complete the spelling word center.

I have 6 different spelling activities they can do at this time.  I currently am using the following activiites:
*rainbow write the words
*put the words in ABC order
*write the word and stamp the word
*write the words on dry erase boards 
*roll and write the word
*use pipe cleaners to make the words

I keep the activities in a pocket chart on the back of my easel.


Spelling words are posted on the reading  wall.

Students take these to their desk and complete the activity.  They must turn in their work in the turn in basket for me to check. 

So far the students love this!!! They are so excited to practice these words and they are able to come more comfortable with the skill we are focusing on for spelling that week. 

Grab some of the word work worksheets for free below!

2.  There is a green basket that has a fluency poem and worksheet.  I am using the fluency first book to get my activities from.  They read the poem and complete the worksheet to go with it.  It is great practice for them.  It reviews several skills and helps them be more fluent.


I am using this book to get my fluency papers.  My students are at a high level this year so I am using the third grade book. 

3.  I also made a fluency center.  This is one of my favorite spots in my room.  The students sit at the stools with a partner.  They have to use the timer to time one another.  They are to read the phrases in less than a minute.  Once they are able to do this successfully three times, then I will test them.  If they pass, then they are able to move to the next set of cards.


The students fight over this center!  They are also pretty good at it, so I am currently working on fluency passages for them to complete once they have mastered all the fluency phrase sets. 

Check out my fluency packet below!


Grab your free fluency tracking sheet by clicking here!

4.  The last option (my favorite!!) is the special sounds center.  This is where students will complete 3 different activities for each special sound.  I call them special sounds because it is easier to group them altogether that way. 

Here is a breakdown of the sounds they will practice:
Ai/ay
Ee/ea
Au/aw
Ou/ow
Igh/y
Oi/oy
Oo
Or 
Ar
Ir/ur/er
Ough/oa
Ew/Ui/Ue
Air/Are


I store all the activities in this drawer system.  I found this at Sam's club for $20! 

They will play a game or complete a center activity, then each one has a worksheet to check for understanding.  Then, the third activity is a book that focuses on this skill with a comprehension worksheet to go with it.  

If they are able to complete each activity correctly, then they will take a quiz.  I use engrade to set up quizzes.  The students will take the quiz and if they pass they will move on to the next sound.

Each sound has a badge that goes with it.  If they successfully pass they will have a badge placed on their locker.  The kids won't stop talking about this.  All they want is a badge for their locker!  I'm thrilled something so simple can be so motivating.  

Once they have passed all these, I am going to move them on to vocabulary activities.  I am working on this also.  Hopefully I will have some time to get that  put together since I am still working on completing my special sound packets. (Eek!! I need to get moving!) 

Check out below to see what packets I've completed so far.  I hope to have the rest finished by the end of the month! 


Grab a free special sound tracking sheet by clicking here

Check out some fun photos of my kiddos at work!!


I would love to hear how you do word work in your classroom!  As you can see, I am all about allowing my students to have some choices and to make learning as much fun as I can.  I also want then to work at their own pace and this allows them to do so.  We are off to a great start, but I will keep you posted on how well the students do.  Thanks for stopping by! 


Sunday, September 7, 2014

I Made it!

saw somewhere how people were putting ribbons in their composition notebooks to use as bookmarks.  I thought this was genius!! So, I went in to school one night and put ribbons in all of my composition notebooks for my kiddos.  I am so excited about this because they always lose their place or they waste pages by skipping over half of them when they open their journal to write in it.  I think this will makes things so much easier.

I use two notebooks with my kids.  One is for writing and one is for reading. 


So, you need a composition notebook, ribbon, scissors, and a hot glue gun.  

First, you open to the back of the notebook. 

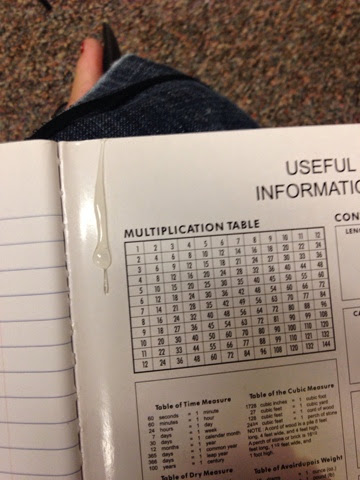
Then, you put a small strip of hot glue on the back of the notebook.

 You don't want it to be too thick! 

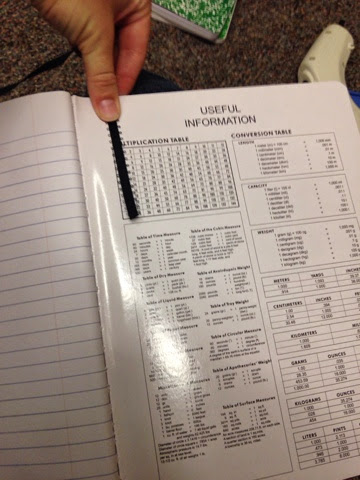
Then, place the ribbon on the glue.  

Then, I pull the ribbon over the top of the notebook.  I let it go past the bottom of the notebook just a little bit. 

I cut the ribbon!

I place it in the front of the notebook to mark the page!

Tada!! You have a notebook with a bookmark.  

I love them and so do my kids! Super easy! I did 20 notebooks in about 20 minutes.  You should give it a try! :)